How to Fix Lenovo OneKey Recovery Damaged Partition Lenovo Hard Disk Partitions Code are: •Recovery is DE94BBA4-06D1-4D40-A16A-BFD50179D6AC •System is C12A7328-F81F-11D2-BA4B-00A0C93EC93B •OEM is BFBFAFE7-A34F-448A-9A5B-6213EB736C22 •Reserved is E3C9E316-0B5C-4DB8-817D-F92DF00215AE •Recovery is DE94BBA4-06D1-4D40-A16A-BFD50179D6AC •Primary is EBD0A0A2-B9E5-4433-87C0-68B6B72699C7 Here's the script from the video: Are you facing issue of Lenovo onekey recovery partiton has damaged? Or it's just not working when you boot for recovery. It does have a simple solutions which involves few commands in command prompt.
July 7, 2015. Retrieved Aug 6, 2012. Retrieved 26 July 2014. Fl studio 41 cracked free download free. 15 November 2010.
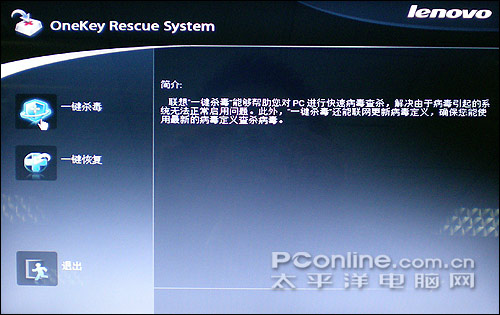
Lenovo OneKey Recovery is a one key recovery software snap in Lenovo products, desktop, laptop, notebook, notepad, etc. When you get a new computer and have system installed, you can use it to make a recovery partition for future factory format. If your new pc comes to you with os already installed, usually, the factory recovery disk is already. As Lenovo one key recovery alternative, AOMEI OneKey Recovery is a powerful software designed to create a factory. AOMEI OneKey Recovery OneKey System Backup. Lenovo Onekey Recovery 7.0 System Backup (Today Downloads: 112) DOWNLOAD OneKey Rescue Engineering DVD.
First of all, please be known that this issue arise when you use EASUS partition recovery to resize your partitions or to divide it. Hence what EASUS does, is it mess up partition flags and then your laptop is not able to recognize the recovery partition.
Hence, the solution i found out is very easy: Open command prompt with administrator access: Now run command - DISKPART Next: LIST DISK Usually it'll show only 1 hard if you're using laptop and has no external hard disk connected and it's disk no. Would be '0'. Since mine disk no was also '0', hence next command is: SEL DISK 0 Then next command is: LIST PART This command shall show you a list of partitions you have in your PC or laptop like this: If you notice, partiton 1 is being shown as OEM, rather it should be Recovery Partition 2 as System is OK Partition 3 as OEM is OK Partition 4 as Reserved is also OK Partition 5,6 and 7 are Primary, as this space i am using already. Hence are OK. Now our biggest culprit is partition 8 which is actually a Recovery partition and is being shown as OEM.
This is also that partition which is used by Lenovo to restore your Laptop to factory settings. Hence here, i need to fix Partition 1 and 8. Steps are simple: Now run -- SEL PART 8 RUN-- DETAIL PART It'll show that no volume is associated with this partition. Hence to fix this, run SET ID=DE94BBA4-06D1-4D40-A16A-BFD50179D6AC after running above command, you'll get: Now run again DETAIL PART See, now it's showing a volume associated with it.
Now we need to fix partition 1 too: Run command: SEL PART 1 SET ID=DE94BBA4-06D1-4D40-A16A-BFD50179D6AC Since both partition i fixed were of recovery, hence the SET ID were same for both partitions. If by chance, your partition 3 is being shown as Primary, not OEM, then you can fix this also by same SET ID command.
I'll write in video description all the SET ID codes which can be used to fix your hard disk partitions. Procedure would be same, like i just did for partition 1 or 8. Now, next command to enable windows recovery option (just for being in safer side) is: reagentc /disable and then reagentc /enable then run 'reagentc /info' to check the status, if it is enabled successfully: Now you can boot your laptop using 'Novo key' and start recovery of your laptop or reset it to factory settings. Thanks for watching this Video. Please do subscribe. Tags: How to Fix Lenovo Onekey Recovery Damaged Partition, lenovo onekey recovery partition deleted; lenovo onekey recovery manual; lenovo onekey recovery download; lenovo onekey recovery factory default; lenovo onekey recovery not working; lenovo onekey recovery create dvd; lenovo onekey recovery windows 8.